Right after I install Endeavour OS, I setup and configure the firewall. To install UFW (uncomplicated firewall), I issue:
sudo pacman -S ufw
Once installed, I start the firewall by opening the terminal and issuing:
sudo systemctl start ufw
sudo systemctl enable ufw
The second command automatically enables the firewall upon booting the computer. At this point, your firewall is up and running. No computers on your network will be able to access it yet. In order to allow certain machines to connect, some specific rules have to be added.
UFW Rules
I have several computers networked in a home office setting and the following rules allow local traffic only. Before setting the rules, I configure my router which, in my case, happens to be provided by Telus to assign a static IP address to each node. Once I have done that, I proceed to issue the following rules:
sudo ufw deny from 192.168.x.x (the x’s are different depending on your setup)
I repeat adding the above rule until every computer on my network has been entered. When done, I check that everything is correct by issuing sudo ufw status verbose in the terminal.
The output should state that the firewall is active and also print out each of the rules I set.
Gnome disable IPv6
Earlier this year, I switched from XFCE to Gnome. Because I don’t need IPv6, I turn it off via the settings menu (Settings > Network > Wired > click on the cog wheel (see red circle)
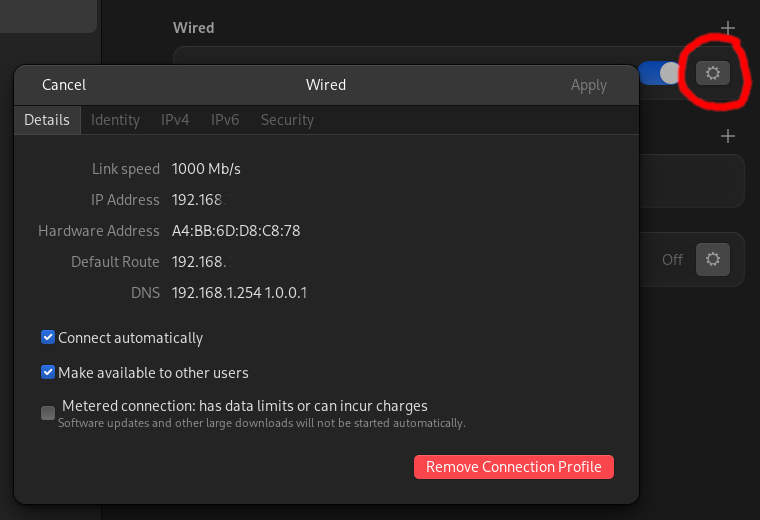
The image above shows the details tab and clicking on IPv6 will give you the option to disable it. Please note that this is my setup and you my have a need for IPv6 so please read up on this topic if you are not sure.
Why disable IPv6
Since I don’t use IPv6, I disable it in order to have only the firewall rules enforced which I actually need / want. Once that is done, I have a working firewall setup which allows traffic from my local LAN only. Further more, I edit the hosts file and add each my computers hostnames in order to access them by name instead of by IP address.
To edit the hosts file, simply issue this command in a terminal:
sudo nano /etc/hosts (press ENTER)
After providing the admin password, the hosts file will open in nano. If you don’t use nano, you can specify your text editor of choice. At the bottom of the file, I add each of my computer like so:
hostname.local 192.168.x.xxx
Again, replace hostname with what ever you named your machine and change the x’s according to your setup. Each computer gets a new line and when done, I save the file by pressing Control X, then Y and Enter.
Please note that you don’t have to enter the machine you are working on. The hosts file only needs the IP address of the other machines on the network. If you don’t mind entering the IP address of a machine manually then you don’t have to edit the hosts file at all. This is especially true if you are only testing EndeavourOS for the first time in a VM.
Last but not least, UFW has a GUI which might be easier for someone new to Linux. To install it, type sudo pacman -S gufw in the terminal. Once installed, you can launch it by typing gufw once again into the terminal. After providing the admin password, the GUI app will launch and the above configurations can be entered by clicking the options.
I don’t think that the GUI version of UFW is necessary. Installing UFW and enabling it only takes three commands. Entering the “allow from” rules as I have described gives you fine-grained control of which machine can access and visa versa.
OpenSnitch
Mac users might remember Little Snitch which is well worth checking out. Linux now has an alternative called OpenSnitch and once installed, prevents processes from accessing the internet unless we approve and accept them to do so. OpenSnitch acts as a firewall and if you run applications that you don’t trust then it is a good idea to install it.
There is no security when it comes to computers so my final recommendation is to keep your machines clean. I use Linux because I do all of my work with opensource software. I would never install some hacked version of Photoshop or the like because running non-verified code makes installing a firewall pointless.
Thank you for reading. I hope that you will find enough information to install and configure UFW right after you install EndeavourOS. If my article is not helpful then you can find a much more detailed introduction to UFW here