If you’re ready to take your Linux workflow to the next level, dive into the world of virtual machines today. With just a few simple steps, you’ll be able to back up, transfer, and deploy your entire system like never before. Get started with QEMU/KVM and VirtManager—and experience the future of computing!
Introduction: Unlocking the True Power of Virtual Machines
In the world of Linux, flexibility and reliability are paramount. But what if you could experiment freely, tweak settings without consequences, and back up your entire system with a few clicks? Enter the world of Virtual Machines (VMs). Unlike traditional Linux installations, VMs offer an unparalleled level of portability, safety, and convenience. Whether you’re a developer testing new applications, an administrator running servers, or just someone looking for an efficient backup strategy, virtualization is a game changer.
In this article, we’ll explore how QEMU/KVM—a powerful and flexible virtualization solution—gives you full control over your VMs, how to easily back them up, and how you can transfer them between systems, ensuring that your environment is always safe and ready for deployment.
Why Virtual Machines Are the Future of Workflows
When we think about workflows, the traditional approach involves installing software directly on a host system, configuring, and testing in place. The catch? What happens if your host system fails or a test doesn’t go as planned? Suddenly, you’re in a situation where undoing changes is far from easy, and recovering your work could be a nightmare.
This is where virtual machines step in.
Unlike your traditional installation, a virtual machine runs in an isolated environment, which means that any changes you make within the VM will never affect your host system. You can experiment, test, and tweak freely without the fear of breaking your main operating system. This sandboxed environment is invaluable for anyone who regularly tweaks their system, tests new applications, or just wants to try something new without the risk of disrupting their workflow.
Advantages of Virtual Machines for Linux Users
- Isolation and Safety
Changes made in a VM won’t affect your host OS. If you make a mistake, you can easily restore the VM to a previous state—no system reinstall needed. - Full System Backups
With VMs, you can backup an entire system, applications, and configurations using the VM image file itself, ensuring you don’t lose valuable data or configurations. - Portability
Want to move a VM from one computer to another? Just copy the VM image to an external drive, and you’re done. The portability is seamless, making it easy to transfer or back up your entire working environment. - More Than Snapshots
Tools like Snapper and TimeShift allow you to take incremental backups of your system, but they lack the portability of VM backups. A snapshot is great for quick rollbacks, but with VMs, you have a complete backup of your entire environment that you can move between systems.
The Power of .qcow2 and How to Back Up Your Virtual Machine
Backing up your virtual machine doesn’t need to be complicated. In fact, one of the most powerful features of virtual machines is how easy it is to back them up. When you create a VM, it typically resides in a disk image file—often in the qcow2 format. This file contains the entire state of your virtual machine: the operating system, applications, and data.
Let’s look at the simplicity of backing up a VM using .qcow2 files:
How to Back Up a VM to an External SSD
- Locate the
.qcow2File
The.qcow2file is typically stored in/var/lib/libvirt/images/. This is where your VM’s virtual disk lives. The size of the file corresponds to the size of your virtual machine’s storage. - Attach an External Storage Device
Plug in an external SSD or USB drive to your system. - Copy the
.qcow2File
Use your file manager or terminal to copy the.qcow2file from the host system to your external SSD. This is your complete backup. - Restore
In the event of system failure, or if you want to migrate the VM to another computer, simply transfer the.qcow2file to the new system and import it into VirtManager.
This process allows you to back up, transfer, or even migrate a VM between systems in a way that is seamless and efficient. You no longer need to rely on complicated manual backup methods; your entire virtualized environment is stored in a single, portable file.
Installing a Virtual Machine: ISO vs. Disk Image
When it comes to setting up virtual machines, there are two primary ways to go about it: installing from an ISO image or using a pre-configured disk image (like a .qcow2 file). Let’s break down the differences and why using a disk image might be the superior option for many users.
Installing from an ISO Image:
- This is the traditional way to install an operating system in a VM. You download the ISO image of your preferred OS, boot the VM from that ISO, and go through the installation process just like you would on a physical machine.
- Time-consuming: You have to manually go through the entire installation process—partitioning, installing software, configuring your environment.
- Long Setup: Depending on the OS, this can take quite a bit of time, and you may need to reconfigure your system settings afterward.
Installing from a Disk Image (e.g., .qcow2 File):
- With a disk image (like
.qcow2), you’re essentially cloning a pre-configured system. - The VM is ready to go, and you can skip the long installation process entirely.
- You simply point VirtManager to the
.qcow2file, and your system is up and running within minutes. - This method allows you to start with a pre-configured setup that’s already tailored to your needs—saving you valuable time and effort.
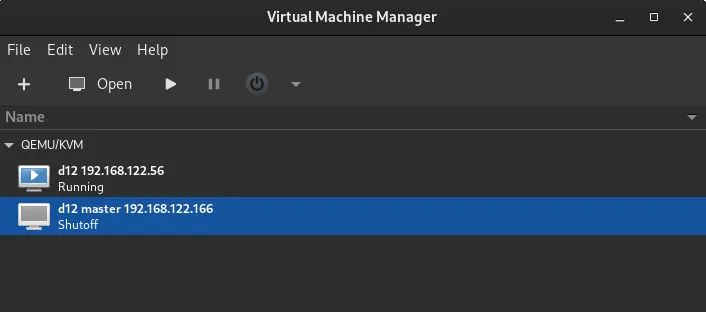
QEMU/KVM: The Unsung Heroes of Linux Virtualization
The real magic behind these capabilities comes from QEMU (Quick Emulator) and KVM (Kernel-based Virtual Machine). These tools provide the virtualization infrastructure for Linux, allowing you to run multiple operating systems simultaneously with minimal overhead and maximum performance.
Why QEMU/KVM Is a Game Changer
- Performance
With KVM, your VM can take advantage of hardware acceleration, making it as fast as running the OS natively. - Resource Efficiency
Unlike traditional hypervisors, QEMU/KVM runs with minimal overhead, giving you more resources for your applications. - Compatibility
You can run virtually any operating system on top of KVM, making it an ideal choice for running Linux, Windows, BSD, and more. - Flexibility
Want to create a snapshot, migrate a VM, or back up an entire system? QEMU/KVM makes all of that simple, with extensive management tools and CLI support.
Embrace the Future of Virtualization with QEMU/KVM
Virtual Machines are no longer a niche tool for developers and IT professionals; they are a fundamental technology for anyone who values efficiency, safety, and flexibility in their workflows. Whether you’re backing up your system, experimenting with new software, or migrating between machines, the ability to work with virtual machines using QEMU/KVM is a game changer.
With easy-to-use tools like VirtManager, robust performance from KVM, and the incredible portability of qcow2 disk images, Linux virtualization opens up a world of possibilities. If you’re not yet using VMs, it’s time to start. The future of work is virtual—and it’s more accessible than ever.