As a new Linux user, you might feel overwhelmed by the terminal and the vast array of commands at your disposal. You might think that fixing problems or customizing your system is a daunting task that requires a deep understanding of the underlying code. But the truth is, with the right tools and a little bit of knowledge, you can accomplish a lot.
But don’t just take our word for it. Let’s take a cue from Walt Kowalski, played by Clint Eastwood, in the movie Gran Torino. In this classic scene, Walt teaches a young boy that with the right tools, you can fix almost anything. WD-40, vice grips, and duct tape might not be directly applicable to Linux, but the principle is sound. Having the right tools and knowing how to use them can make all the difference.
This video clip is used for educational purposes under fair use. It features a brief segment from the movie “Gran Torino”.
The Most Powerful Tool Linux Has to Offer
Now that you understand that fixing something isn’t so hard with the right tools, let’s look at the most powerful tool Linux has to offer: the terminal. With a few essential commands, you can unlock the power of the terminal and start fixing problems, customizing your system, and automating tasks like a pro.
Imagine you’re at a big shopping mall, and you’re looking at the map near the entrance. You see a big red arrow that says “You are here.” That’s exactly what the
pwdcommand does. It tells you where you are in the file system.
Finding Your Way Around: pwd, cd, and ls
pwd
Print Working Directory. This command tells you where you are in the file system, just like the big red arrow does in the mall. To use this command, simply typepwdin the terminal and press Enter.ls
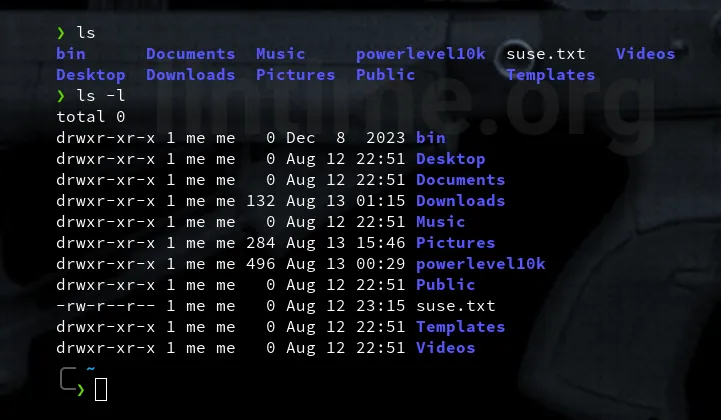
Imagine you’re browsing through a folder in a graphical file manager, like Nautilus or Dolphin. You can see all the files and subfolders inside that directory, right? In the terminal, it’s a bit different. To see what’s inside a directory, you need to ask the terminal to list its contents using the “ls” command. Think of it like asking a tour guide to show you around a room – the “ls” command is like saying, “What’s in here?” and the terminal responds with a list of everything it finds.ls -la
This command lists the files and directories in your current directory, including hidden files and directories.
Think of it like this: when you use the regularlscommand, you only see the regular files and folders in a directory. But withls -la, you get to see everything, including the hidden files and directories that are often used for configuration or security tasks.
These hidden files and directories are usually prefixed with a dot (.) and are not visible with the regularlscommand. By usingls -la, you can see everything that’s in a directory and what’s going on behind the scenes.
Bonus tip: Want to keep a secret from your little sister (or anyone else who uses your computer)? Try naming a file with a dot at the beginning, like .secret.txt. This will make the file hidden, and it will only be visible when you use thels -lacommand. Just remember, with great power comes great responsibility… don’t use this trick to hide anything too naughty!
Navigating the Terminal: cd, ls, and flags
cd
Change Directory. This command allows you to move to a different directory.
Let’s say you’ve just opened the terminal and you’re currently in your home directory. If you type ls, you’ll see a list of directories like Desktop, Documents, Downloads and so on. If you want to move into the Downloads directory, you can use the cd command like this:cd Downloads
Press Enter, and you’ll be taken to the Downloads directory. You can verify this by typingpwdor by typinglsagain to see the contents of the Downloads directory.cd..
Let’s say you want to go back to the home directory. You can reuse thecdcommand but with a special argument: two dots. The..symbol represents the parent directory, which in this case is your home directory. To go back, simply type:cd..
Press Enter, and you’ll be taken back to your home directory. You just usedcd Downloadsto move into the Downloads directory, and now you’ve usedcd..to move one level up, back to your home directory. You can verify this by typingpwdorlsagain to see the contents of your home directory.
Bonus tip: Don’t worry if you get lost or want to start over. You can simply typeexitto close the terminal, and then reopen it to start fresh. This can be a helpful way to reset and try again if you’re not sure what you’re doing.
Creating and Managing Files and Directories: mkdir and rm
mkdir
Themkdircommand is used to create a new directory. To use it, simply typemkdirfollowed by the name of the directory you want to create. For example:mkdir sampledirectory
This will create a new directory called sampledirectory in your current directory.rm
Thermcommand is used to remove a file or directory. To use it, simply typermfollowed by the name of the file or directory you want to remove. For example:rm samplefile.txt
This will remove the filesamplefile.txtfrom your current directory.
However, if you try to remove a directory withrm, you’ll get an error message saying that the directory is not empty. This is becausermonly removes empty directories.
To remove a directory and all of its files inside, you need to use the-roption withrm, like this:rm -r sampledirectory
The-roption stands for “recursive” and tellsrmto remove the directory and all of its contents, including subdirectories and files.
Think of it like this:rmis like throwing away a single piece of trash, whilerm -ris like emptying the entire trash can.
Bonus Tip: Be careful when usingrm -r! This is a powerful command that knows no mercy. Before deleting a directory and all of its contents, make sure you’re deleting the right one. Double-check the directory name and contents before pressing Enter. It’s always better to be safe than sorry!
Security and Data Protection: shred
shred
This command securely deletes a file by overwriting it with random data.
Most people just delete files, which sends them to the recycle bin. But advanced computer users might still be able to access those deleted files. That’s whereshredcomes in.
Think of it like using a paper shredder, but for digital files. Let’s say you have a file calledwhy-i-hate-moms-cooking.txtthat you no longer want. By usingshred why-i-hate-moms-cooking.txt
before deleting the file, you ensure that nobody – not even the most skilled computer experts – can read it again. Do you have something to shred?

A Real-Life Example
Now that you’ve learned the basics of the Linux terminal, it’s time to put your new skills to good use! Let’s install a beautiful icon theme for Gnome using the terminal.
Step 1: Download the Icon Theme
Click on this link to download the Kora icon theme into your Downloads directory.
Step 2: Unzip the Icon Theme
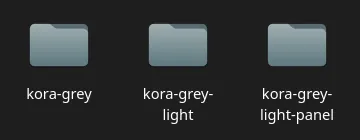
Once the download is complete, open your file manager and right click on it to extract it. Give it a minute and when done, double-click the new folder and double-click the next folder once more as the creator has nested the icon files. Once you see three directories, you are in the right place.

Step 3: Open a Terminal in the Folder
Nor right-click inside the folder with the three kora icons folders and select “Open Terminal Here”.
Step 4: Move the Icon Theme to /usr/share/icons
Use the sudo command to move the three icon theme folders to the /usr/share/icons directory:
sudo mv -r kora* /usr/share/icons
Step 5: Activate the New Icon Theme
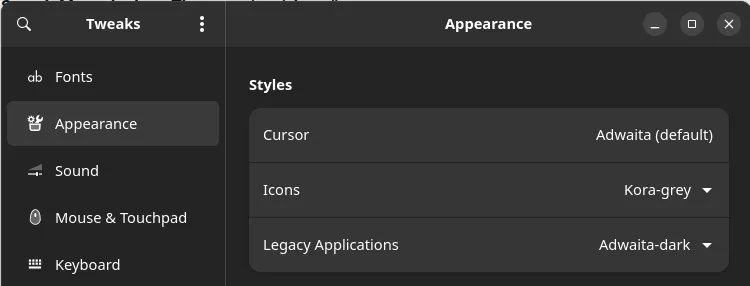
Just moving the new icon folders to the correct directory does not automatically apply them. To apply the new icons, use Gnome Tweaks > Appearance > Icons and select Kora from the drop-down list. You can find Tweaks in your Applications view, or by searching for it in the Activities Overview.

Congratulations!
You’ve successfully downloaded and installed a beautiful and professional-looking icon theme with the help of the Linux terminal! You’re no longer a newbie, and you can now help others who post in the forums with achieving this task. Great job!
Check back soon for more valuable content on lintime.org! We’re constantly expanding our resources to help you master the Linux terminal and get the most out of your Linux experience.
